FYSETC-PT100Stick
FYSETC-PT100Stick is a Pololu formfactor MAX31865 breakboard for FYSETC S6/Spider and similar 32 bit 3D printer control boards. It is base on VORON PT100Stick.

1. How to use
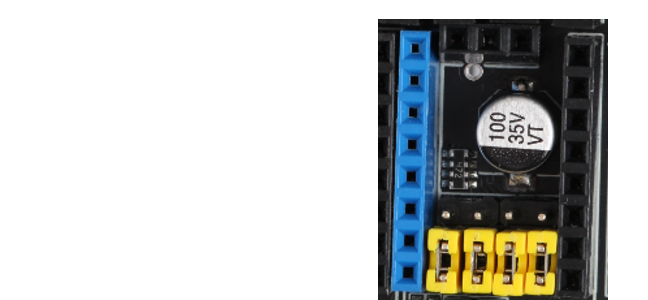
1.1 Set the jumpers

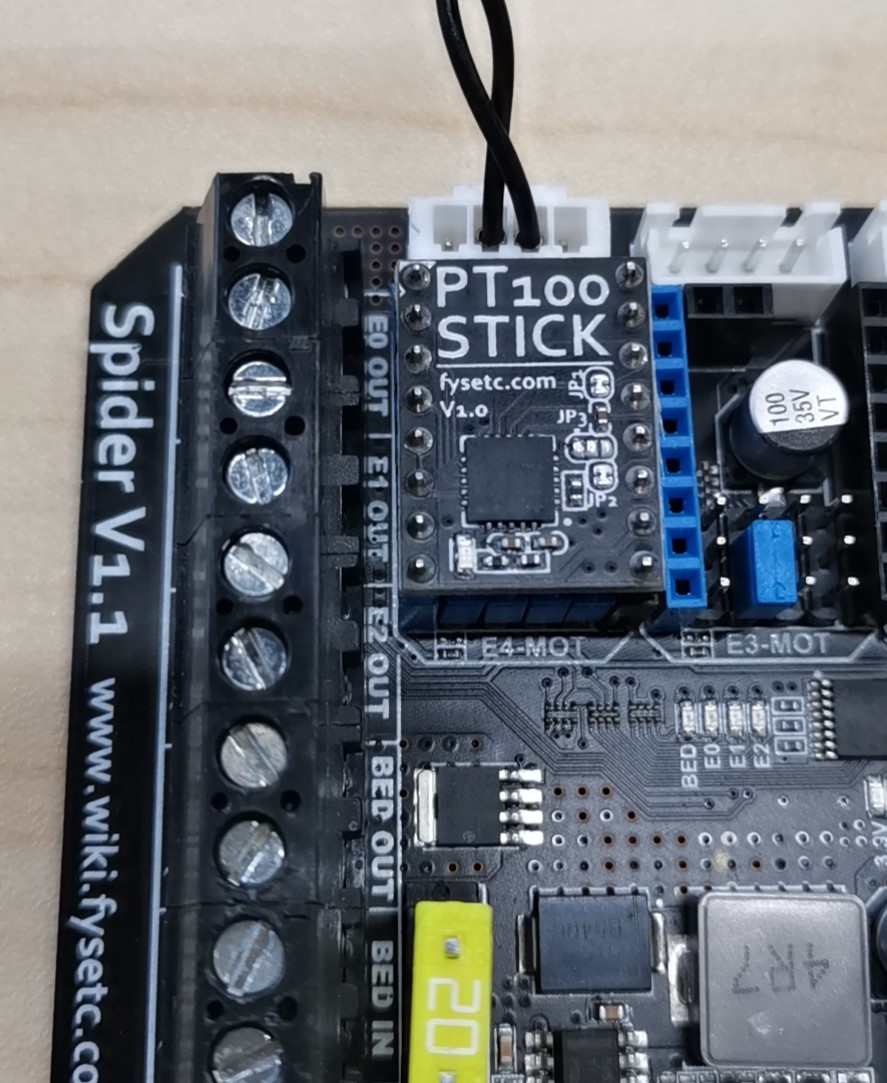
Then insert it to the socket.

1.2 Firmware setting
1.2.1 Klipper firmware
-
SSH into your
RaspberryPiand edit yourprinter.cfgfile usingnano. -
Remove any old thermistor configuration under [extruder]. (sensor_type, sensor_pin, etc.)
-
Under [extruder] add these lines:
sensor_type: MAX31865
sensor_pin: PD11 # I pulg into Spider E4-MOT socket, `cs` pin is the sensor pin
spi_speed: 4000000
spi_software_sclk_pin: PE12
spi_software_mosi_pin: PE14
spi_software_miso_pin: PE13
rtd_nominal_r: 100
rtd_reference_r: 430
rtd_num_of_wires: 2 # Edit it according to the wires count of your PT100 sensor, like `3` or `4`.
-
If you are in EU or any 50 Hz country add this line:
rtd_use_50Hz_filter: True -
Save your changes by typing CTRL+X, Y, [ENTER]. Send FIRMWARE_RESTART from the console in Octoprint and test! It should work.
-
Run PID tuning. PT100 readings will be different from your previous thermistor. For the best thermal accuracy, follow this to PID tune:
1. Heat your bed to 100C.
2. Move your hothend to the center and 5-10 mm above bed
3. Set fans to 25%: "M106 S64"
4. Run: "PID_CALIBRATE HEATER=extruder TARGET=245"
5. This will run for a few minutes. When finished, save with: "SAVE_CONFIG"
1.2.2 Marlin firmware
Step 1: Change pins file
Add the follow lines to pins_FYSETC_SPIDER.h before #endif line.
#define Thermo_SCK_PIN           PE12//SCK
#define Thermo_do_PIN            PE13//MISO
#define Thermo_CS1_PIN           PD11//CS1 E4_CS_PIN
#define Thermo_CS2_PIN           -1//CS2
#define MAX31865_MOSI_PIN        PE14

#define MAX6675_SS_PIN           Thermo_CS1_PIN
#define MAX6675_SS2_PIN          Thermo_CS2_PIN
#define MAX6675_SCK_PIN          Thermo_SCK_PIN
#define MAX6675_DO_PIN           Thermo_do_PIN
You need to change Thermo_CS1_PIN to related cs if you insert PT100Stick to other stepper driver socket.
| CS | pin |
|---|---|
| X-CS/PDN | PE7 |
| Y-CS/PDN | PE15 |
| Z-CS/PDN | PD10 |
| E0-CS/PDN | PD7 |
| E1-CS/PDN | PC14 |
| E2-CS/PDN | PC15 |
| E3-CS/PDN | PA15 |
| E4-CS/PDN | PD11 |
Step 2: Change configuration.h file
#define TEMP_SENSOR_0 -5
#define MAX31865_SENSOR_OHMS_0      100   // (Ω) Typically 100 or 1000 (PT100 or PT1000)
#define MAX31865_CALIBRATION_OHMS_0 430   // (Ω) Typically 430 for AdaFruit PT100; 4300 for AdaFruit PT1000
2. Toubleshooting
- ADC_OUT_OF_RANGE
- If you never get a reading; check your wiring.
- If you get this error after some time; first try adding a capacitor (explained below), if it doesn’t help, try shielded wires or a 3-wire sensor.
- Under & Over Voltage
- Possibly a wiring issue, check wiring, replace with thicker wires if possible.
- Possibly a software SPI issue, try using a Pi MCU (explained below) for troubleshooting.
- Possibly electrical noise issue, try adding a capacitor (explained below).
- If nothing helps, try shielded wires or a 3-wire sensor.
- RTD_INPUT_DISCONNECTED
- Wiring issue, check your wires.
3. Related doc
https://docs.vorondesign.com/community/electronics/xbst_/PT100.html