Creality K1 MAX 8mm Graphite Build Plate & Heated Bed
Creality K1 MAX 8mm Graphite Build Plate & Heated Bed
Product Introduction
For Creality K1 MAX Upgraded Build Plate for Fast Heating and Ultra-flat 3d.
Buying options
Set 1: 1x Graphite plate
Set 2: 1x Silicone heating pad + 1x 1.5mm Sticker
Set 3: 1x Silicone heating pad + 1x 1.5mm Sticker + 1x Graphite plate

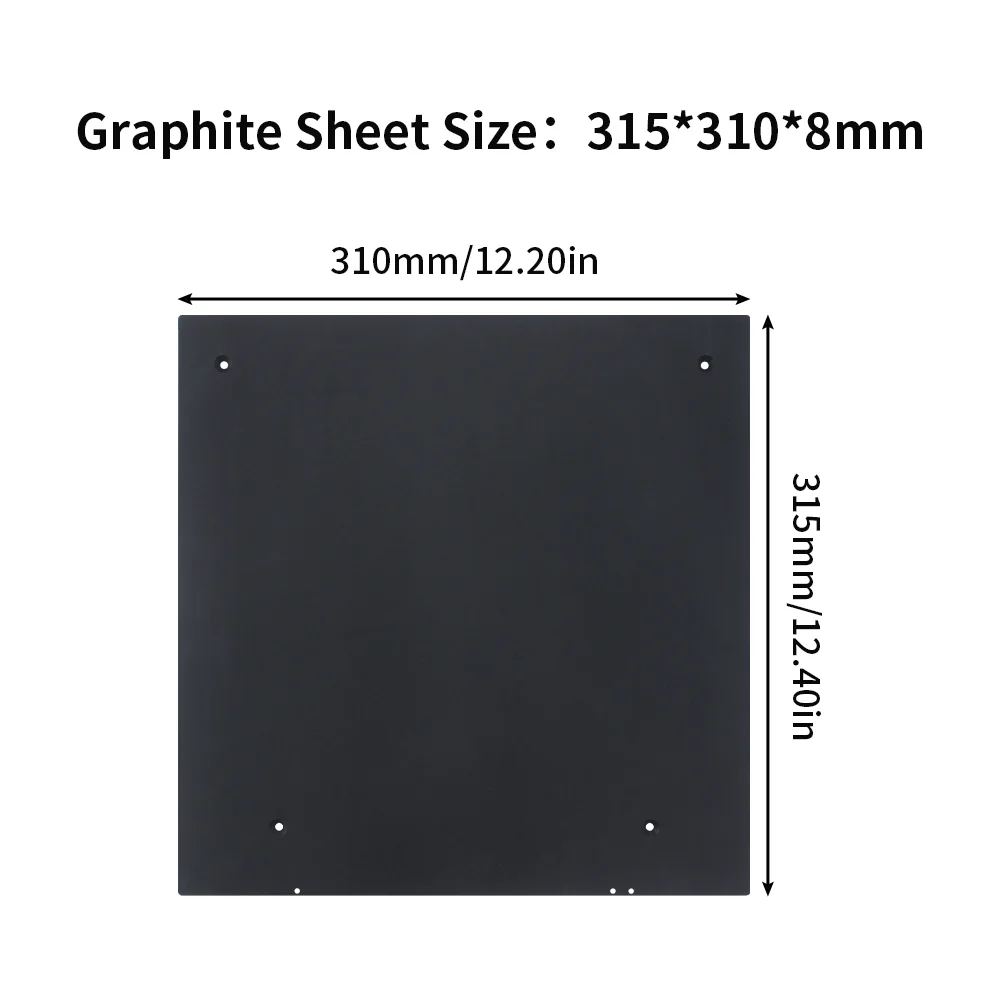
Dimensions
Heating Pad Installation
Alignment
The heating pad and print surface sticker must be oriented correctly to ensure the mounting holes align with those in the graphite bed.
Before attempting installation please ensure the graphite bed is cleaned thoroughly to remove any oils, dirt and dust.
Work from one edge, only removing part of the backing paper. Slowly push down on the surface of heating pad moving side to side as you go. Then gradually work across the entire bed removing the backing paper as you go and appling even pressure.
You should then allow the glue to set for at least 24 hours.
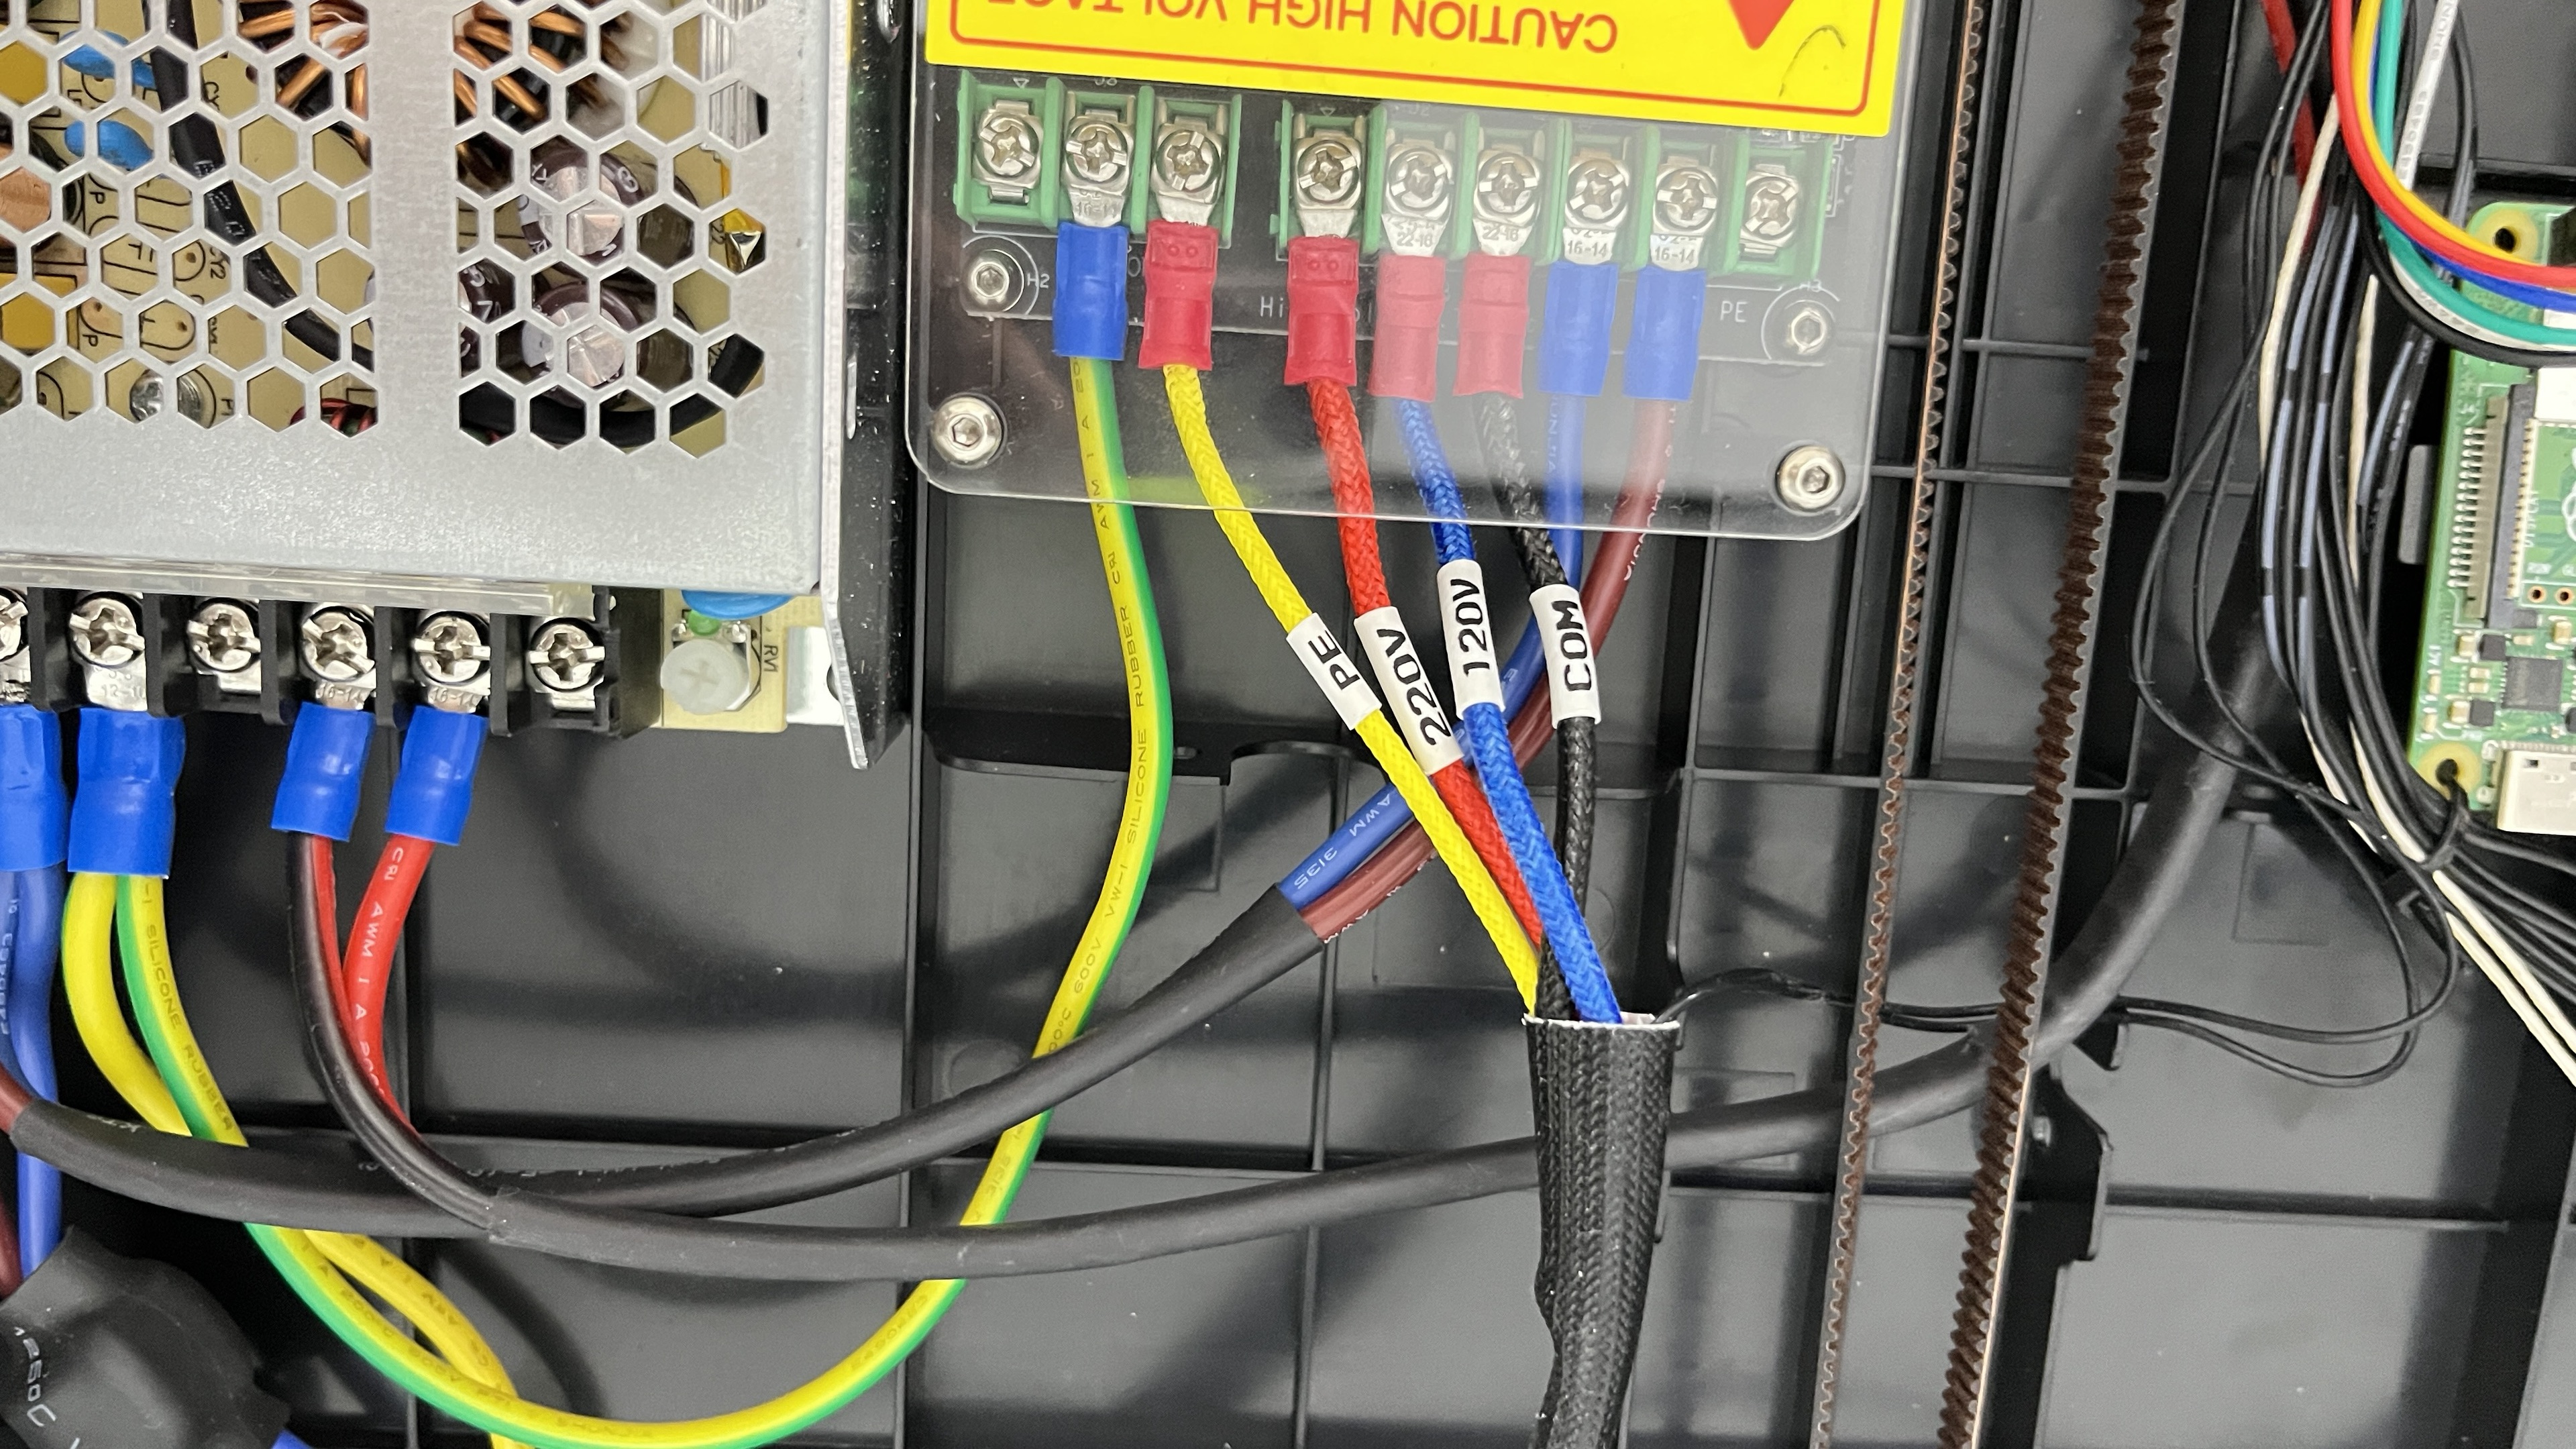
Heated Bed Wiring
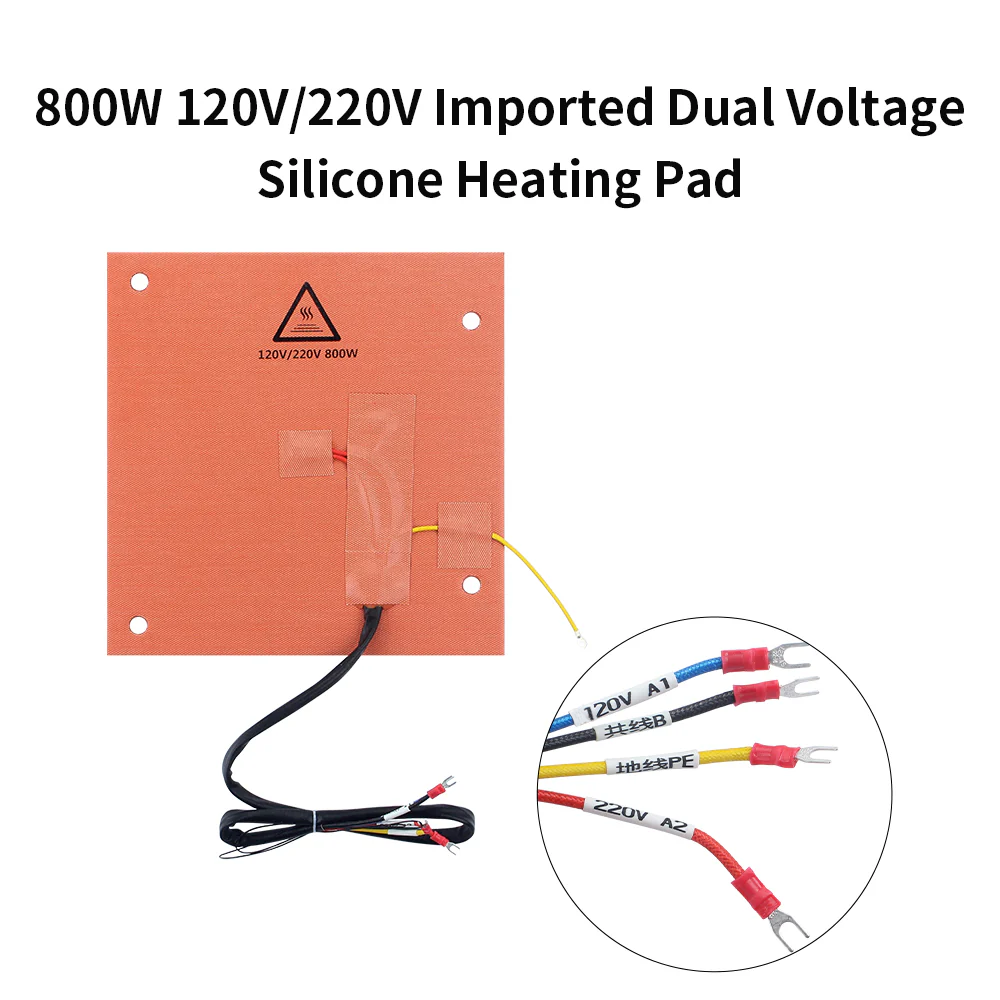
Wiring the heated bed using the stock Creality K1 SSR is the same for both 120 and 220 voltages, see picture below. If using an aftermarket SSR please refer to the SSR manufactures guidance on wiring.
Bed Assemebly
Tip
You may find it eaiser to make adjustment to the bed levelling if you use an M4 nyloc nut on the underside of the graphite bed before adding the springs to the long M4 countersunk bolts
Installation video for Creality K1 MAX Upgraded Graphite 8mm Build Plate
Print Surface Installation
Tip
You may find heating the bed during the installation helps with adhesion.
Before attempting installation please ensure the graphite bed is cleaned thoroughly to remove any oils, dirt and dust.
Work from one edge, only removing part of the backing paper. Slowly push down on the surface of sticker moving side to side as you go. Then gradually work across the entire bed removing the backing paper as you go and appling even pressure.
You should then turn off the heated if you installed with the bed on and allow the glue to set for at least 24 hours.
Where To Buy
Tech Support
Technical Support Email: support@fysetc.com
Order Support Email: shop@fysetc.com